Zero-waste quirky planters that you can create at home
It’s amazing how many waste products you can put to good use. For us, most of them find their way to the garden. DIY planters are unique and add an element of quirk to your home. See how these plastic bottles have made little corners of our home beautiful- that’s so much better than just lying in a landfill, right?
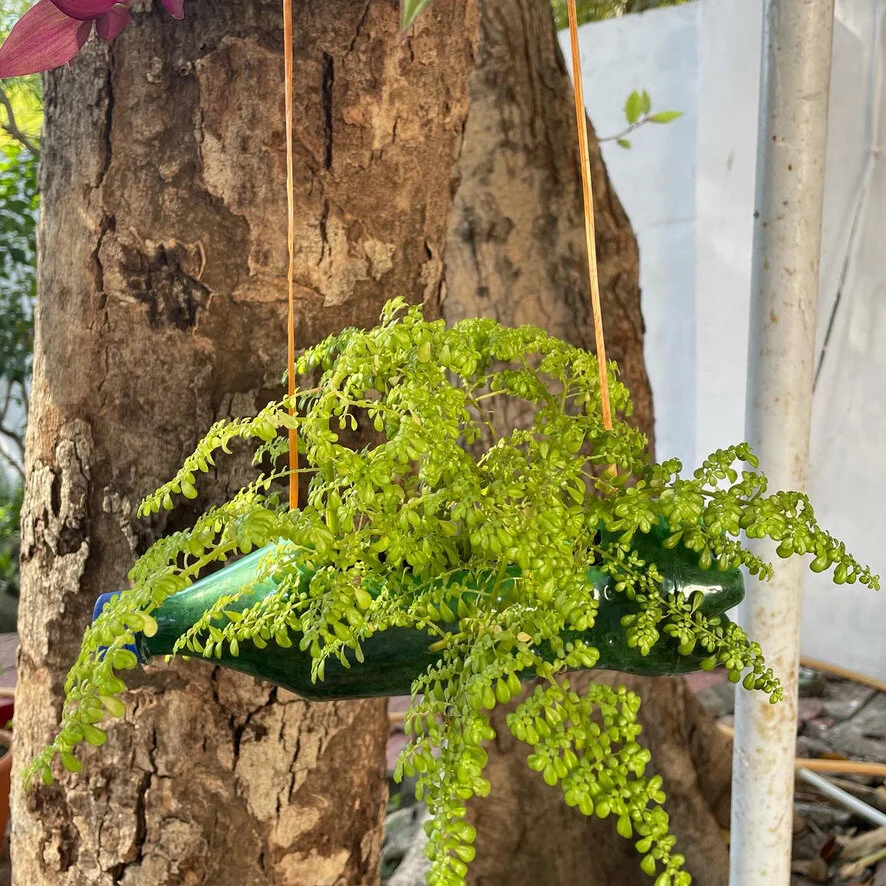
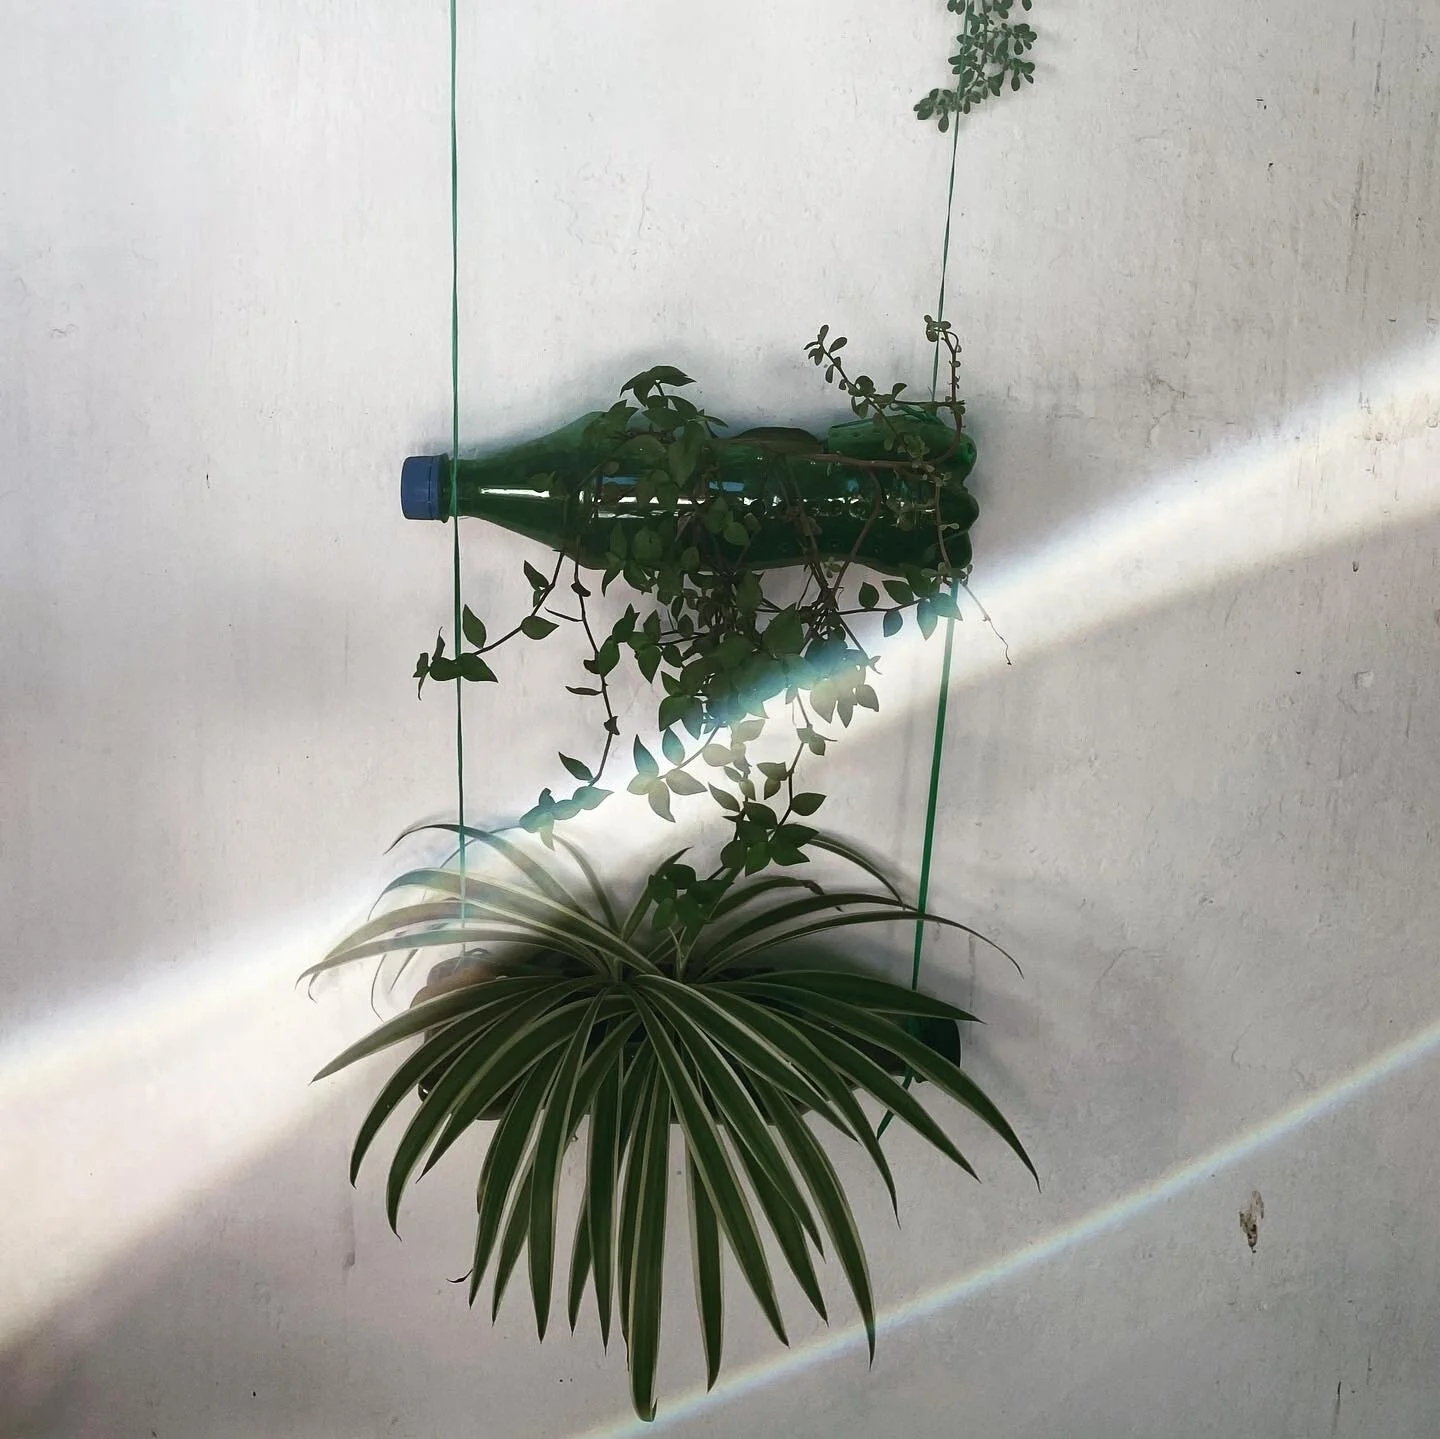
Plastic bottle planter
If you have any plastic bottles lying around, don’t throw them away! Make these cute planters instead and hang them in your balcony or garden.
We all know that single-use plastic is a menace to the environment- the best thing to do is to avoid buying plastic products altogether, but the next best thing is to reuse it in the best way possible. This, for example, this is a great DIY plant holder made from any plastic bottle. Here’s what you need to do:
Carve out a large oval-shaped portion of one side of the plastic bottle (this will be the top of your planter). A hot knife will help in smooth cutting of the bottle.
Punch holes on each side of the top and tie strings or ribbons for hanging
Punch a few small holes on the bottom side of the bottle-planter for water drainage
Add soil or planting mix in the bottle
Plant seeds or transplant any plant to the bottle
Use it as an individual planter or hang a few such planters one on top of the other to make a long planter (refer to the first photo). Hang it anywhere you please!
Green coconut planters
Featured here is a coconut shell from coconut water that was consumed sometime last summer.
Our jade plant is clearly thriving in this one! Over time, our all-natural planter has changed colours and has a nice earthy, weathered look to it. Next time you order some coconut water, save the shell to add some spark to a corner of your balcony. Here is what you need to do:
Use a hammer and a nail or coconut carver to make a drainage whole at the bottom of the coconut
If the top opening is too narrow, use a knife to make it larger
Fill with soil/ potting mix and add a plant of your choice.
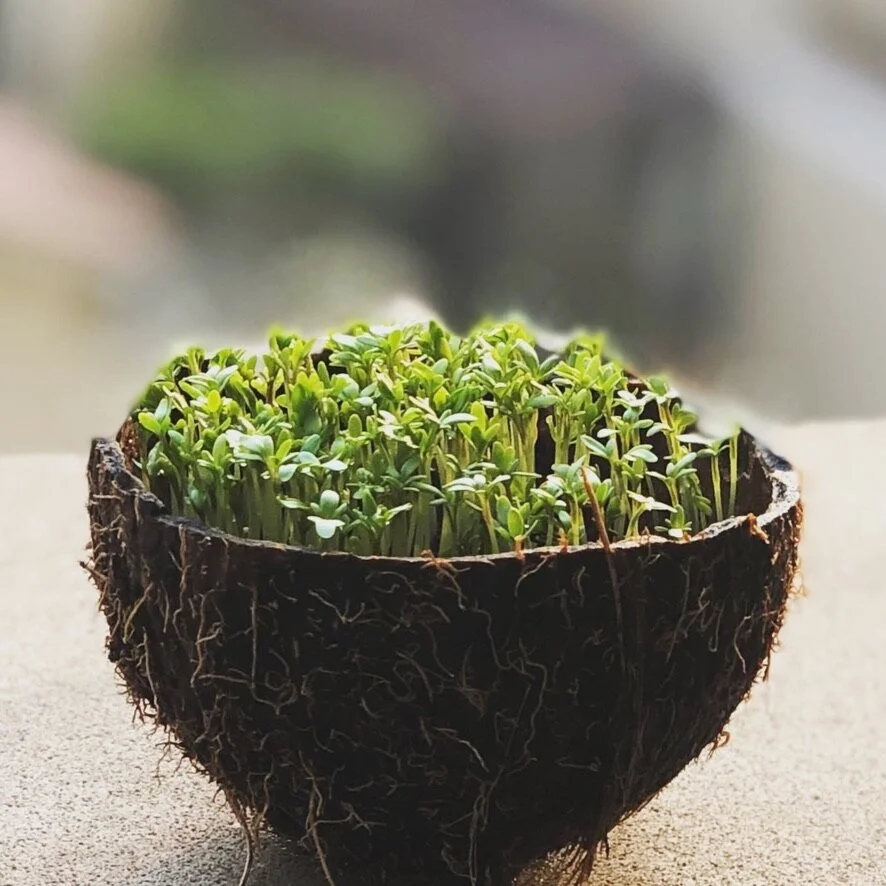
Microgreens growing in a coconut shell
Using the same steps above, you can even use regular coconut shells to make planters. We’ve used them to plant microgreens - apart from looking adorable, the microgreens grow really well in them!
Coconut shells take nearly a year to decompose - so it’s not a good idea to add them to your compost bin if you’re composting at home. Instead - try making these planters!
Let us know if you end up trying these - we would love to see what you create. :)